Now that Sale-A-Bration has started, remember you can earn FREE SAB items for every $50 you spend online, in person or at a workshop. And you can earn even more FREE items when you host an SAB party. This card uses one of the free SAB stamp sets called See Ya Later and some of the pretty Sweet Sorbet SAB Designer Series Paper. As cute as this card is, it was really quick and easy to put together - the best kind, right?!
I stamped the birthday sentiment from See Ya Later stamp set in Early Espresso ink onto a 2" strip of Very Vanilla cardstock. Then I punched the left edge of the cardstock with one of the new Tag Topper Punches from the Occasions Mini Catalog - LOVE! I tied off the tag with a piece of Crisp Cantaloupe Ruffled Trim and Early Espresso Baker's Twine. This pretty, pretty pattern paper is one of the sheets from Sweet Sorbet DSP in Pool Party and Early Espresso. Finally, I added some Dazzling Details glitter to the birthday cake and candles for just a little touch of shimmer.
{Inside}
Recipe:
Stamps: See Ya Later
Ink: Early Espresso
Cardstock: Crisp Cantaloupe, Pool Party, Early Espresso, Very Vanilla, Sweet Sorbet DSP
Accessories: Early Espresso Baker's Twine, Tag Topper Punch, Dazzling Details
My Stampin' Events
Current Stampin' Up! Promotions
Mary Rindal is an Independent Stampin' Up! Demonstrator in Greenwood Village, Colorado.
Thursday, January 30, 2014
Tuesday, January 28, 2014
Petal Parade - Hello Card
The annual Sale-A-Bration event from Stampin' Up! begins today. This is your chance to earn FREE SAB exclusive items with every $50 order you place and also earn bonus hostess dollars when you host a qualifying workshop. There is no better time to get those items on your wish list and stock up on basics. This Petal Parade stamp set is just one of several stamp sets available for FREE!
I randomly stamped the images from Petal Parade in Crisp Cantaloup, Daffodil Delight and Pistachio Pudding ink onto two pieces of Whisper White cardstock. These are matted onto a narrow mat of Basic Black cardstock and wrapped with a knot of Summer Starfruit Stitched Satin Ribbon. This stamp set is so versatile and you can use with a wide variety of sentiments or even on blank cards. Here I used the Hello friend sentiment from Peachy Keen, stamped in Island Indigo ink and punched out with the Modern Label Punch. This punch fits the HELLO portion of the sentiment perfectly. I tucked the sentiment under the ribbon knot with a few glue dots.
{Inside}
Recipe:
Cardstock: Soft Sky, Basic Black, Whisper White
Ink: Crisp Cantaloup, Daffodil Delight, Pistachio Pudding, Island Indigo, Soft Sky
Accessories: Summer Starfruit Stitched Satin Ribbon, Modern Label Punch
My Stampin' Events
Current Stampin' Up! Promotions
Mary Rindal is an Independent Stampin' Up! Demonstrator in Greenwood Village, Colorado.
Wednesday, January 22, 2014
Another Great Year - Interactive Waterfall Card
LOTS of pictures today because I want you to see all the movement in this Waterfall Card using the new Another Great Year birthday stamp set. This great birthday set is in the Occasions Mini Catalog and features an enormous Happy Birthday banner image and 4 smaller images, birthday candles with wish sentiment, macarons, cupcake and another great year sentiment.
A Waterfall Card features a series of images (or sentiments) on stacked mats that flip up and reveal the image underneath as you pull the tab (or ribbon). You can a bit of the mechanism in the pictures below.
The dimension and instructions for a Waterfall Card are very well written in a tutorial on Splitcoast Stampers website here. However, the elements for the Waterfall Card can also be used with altered dimensions to create a three tier waterfall, a double waterfall or even as an interactive element on a scrapbook page! Once you make one, have fun playing with altered dimensions or stacked waterfalls.
I had a lot of fun making this Waterfall Card and will be making several more of them this week for an Occasions Catalog Swap. Good thing these that these images are easy to color! You can see that this Another Great Year stamp set made it really
easy for me with the four smaller images perfectly coordinated and
easily colored. I added some glitter with a swipe of Dazzling Details on each of the pieces. I used the large Birthday banner stamp for the inside of my card.
My Stampin' Events
Current Stampin' Up! Promotions
Mary Rindal is an Independent Stampin' Up! Demonstrator in Greenwood Village, Colorado.
Sunday, January 19, 2014
Stamp Review Crew: Chalk Talk Edition
This edition of the Stamp Review Crew features Chalk Talk stamp set, one of my favorite and most used stamp sets! With the coordinating Chalk Talk Framelits, this versatile set will have you creating fast and easy cards, tags and scrapbook pages for so many occasions.
I stamped this clean and simple card using the thank you sentiment from the Chalk Talk set. This card also features the Circle Thinlits Card Framelit and one of the Adorning Accents Textured Impression Embossing Folders.
I stamped the sentiment in Real Red ink onto the Watercolor Paper, because I love the off white color and the subtle texture of this paper! This is Heat Embossed with Iridescent Ice Embossing Powder to give it a nice finish and a bit of sparkle. Behind the circle I added a heart punched from the Red Glitter cardstock.
This card features the Chalkboard Technique, which is kind of fun to play with. First, I stamped the grateful stamp in Whisper White Craft Ink onto the Basic Black cardstock. This is Heat Embossed with White Embossing Powder. Then I took a slightly damp paper towel, tapped it on the Whisper White Craft Pad and wiped the ink onto the cardstock in a few places. Finally, I used the Chalk Marker and a ruler to draw a border.
This is mounted onto a piece of Watercolor Paper. To 'hang' my chalkboard, I punched the piece with a 1/16" Circle Punch and threaded a three-strand width of White Bakers Twine through and knotted the ends loosely. I added a Mini Glue Dot under each knot to secure the loose knots. The loop is strung over two Acrylic Buttons, the smallest button fits perfectly inside the largest.
Thanks for stopping by! Be sure to click through to all of the blogs on the Stamp Review Crew: Chalk Talk Edition by using the Previous and Next Buttons below. I also listed the Blog Roll of The Stamp Review Crew: Chalk Talk Edition at the bottom of this post. You'll find tons of inspiration and creativity! Happy Blog Hopping.
Chalk Talk Blog Roll
- Heidi Baks runningwscissorsstamper.
blogspot.com - Cindy Beach stampspaperandink.typepad.com/
- Adriana Benitez escape2stamp.com
- Tanya Boser tinkerin-in-ink.
blogspot.com - Debra Burgin heartfeltinkspiration.
com/ - Jill Coleman jillstamps.com/
- Mike Funke stampin-style.
typepad.com/ - Shana Gaff stressfreestamping.
blogspot.com - Yapha Mason yaphamason.com
- Mary Rindal maryrindal.com/
- Ann Schach stampinchic.com/
- Nancy Smith iguanastamp.wordpress.
com/ - Martha Stewart seasonsofstamping.
com/ - Dawn Tidd tiddbitsfromdawn.
typepad.com - Kerry Willard Bray kerrywillardbray.com
- Paula Wright paulastamps.blogspot.
com/
My Stampin' Events
Current Stampin' Up! Promotions
Mary Rindal is an Independent Stampin' Up! Demonstrator in Greenwood Village, Colorado.
Tuesday, January 14, 2014
Peachy Keen - Friend cards
This card features the Peachy Keen stamp set and On Film Framelits Dies from the Occasions Catalog from Stampin' Up! that debuted last week. The stamp set and framelits are available individually or bundled at a 15% discount. The images coordinate very well, but aren't necessary for each other. I especially love that this Framelits Die set emboss as well as die cut, what a great finishing touch to the images!
I stamped the You're Peachy Keen sentiment in Crisp Cantaloup ink and then Heat Embossed it with Iridescent Ice Embossing Powder. I have always love Heat Embossing, it is one of the first techniques that really hooked me on Stamping! Heat Embossing with Iridescent Ice gives just a touch of shine without too much bling. Sometimes you want that extra sparkle, but for this card I wanted a little less and Iridescent Ice was just right. I die cut the sentiment piece and a mat of Island Indigo with the Ovals Framelits. For the polaroid die cut piece, which also has embossed lines and details, I added a center of Crisp Cantaloup Designer Series Paper. The little arrows on the outside and inside of the card are also from the Peachy Keen stamp set.
{Inside}
Recipe:
Stamps: Peach Keen
Cardstock: Island Indigo, Crisp Cantaloupe, Pistachio Pudding, In Color DSP Stack
Ink: Crisp Cantaloup, Pistachio Pudding
Accessories: On Film Framelits Dies, Iridescent Ice Embossing Powder
My Stampin' Events
Current Stampin' Up! Promotions
Mary Rindal is an Independent Stampin' Up! Demonstrator in Greenwood Village, Colorado.
Saturday, January 11, 2014
White on White - Winter Sparkle Card - Festive Flurry
What do you think of this White on White Winter Sparkle card I made this weekend using the cardabilities sketch #90 and lots (and lots!) of Iridescent Ice Embossing Powder?! This was a beautiful sketch to work with. I wanted to use the Festive Flurry stamp set and Festive Flurry Framelits to create a wintery card.
The Festive Flurry bundle is a carryover item from the Stampin' Up! Holiday catalog, which means that you can still order the stamp set and the framelits - hurray! That makes me so glad because it's looking like we have lots of winter left around here, so I'll be getting lots of use out of this set!
I started with a Whisper White base and then cut a card front from Watercolor Paper. I stamped several snowflakes from the Festive Flurry set in Whisper White ink on this paper and then Heat Embossed it with Iridescent Ice Embossing Powder. The next layer is Whisper White cardstock that I stamped the En Francais background stamp in Whisper White Craft Ink. I Heat Embossed this layer with White Embossing Powder. Two of the staggered layers are Whisper White cardstock, stamped with snowflakes in Whisper White Craft Ink and Heat Embossed with Iridescent Ice EP. The square in between those layers is Whisper White cardstock which is texture embossed in the Big Shot with the Polka Dots Textured Impressions Embossing Folder.
The snowflake is the second largest snowflake from Festive Flurry stamped in Whisper White Craft Ink onto Whisper White cardstock and Heat Embossed with Iridescent Ice EP. Then I die cut with the matching snowflake Framelit and the smallest snowflake framelit at the same time. Die cutting these at the same time makes it easy to center the smaller snowflake inside the larger one, and it's one less Big Shot step as well. The Magnetic Platform is really helpful when die cutting these stamped images! I finished with a banner sentiment, Thank You, stamped in Silver Encore ink and Heat Embossed in Silver EP.
{Inside}
Recipe:
Stamps: Festive Flurry, From My Heart
Ink: Silver Encore, Whisper White Craft
Cardstock: Whisper White, Watercolor Paper
Accessories: White EP, Iridescent Ice EP, Festive Flurry Framelits, Polka Dots TIEF
My Stampin' Events
Current Stampin' Up! Promotions
Mary Rindal is an Independent Stampin' Up! Demonstrator in Greenwood Village, Colorado.
Friday, January 10, 2014
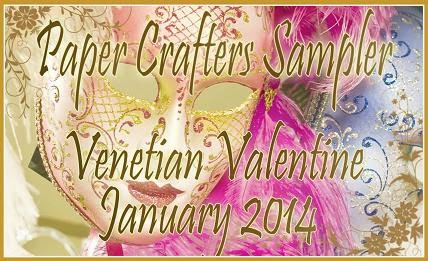
Venetian Valentine - January Paper Crafters Sampler
I am excited to announce that I joined the design team for the Paper Crafters Sampler, an online magazine. For more information about this magazine, check out the Paper Crafters Sampler Blog.
And it's time
to release the 5th year of the Paper Crafters Sampler. The first issue of the year will feature projects and cards for the upcoming Valentine's Day. Inside
the January issue, Venetian Valentine, you'll find soft and subdued
colors, fancy flourishes, embossed surfaces and splashes of gold. Tres
le femme! The template of the month is the Fliptop Heart Trinket Box.
Here is a sneak peek of my project for this month, a Venetian themed Valentine featuring a beautiful, feminine Embossing Technique with soft colors and lots of Gold and Gold Embossing! This is one of my favorite cards I've made this year! Be sure to go to Paper Crafters Sampler to get your January issue. Get there by midnight tonight for the Early Bird Special!
Mary Rindal is an Independent Stampin' Up! Demonstrator in Greenwood Village, Colorado.
Tuesday, January 7, 2014
Wallet Gift Card - Pomp and Circumstance
Over the weekend I shared several projects using the Pomp and Circumstance stamp set with the Stampin' Addicts Occasions Catalog Blog Hop. One of the projects was this Wallet Gift Card, with a pocket on the inside to tuck a gift of cash. This card is designed to accommodate checks or cash as well as fit into a legal sized envelope. I wanted to share a few more images of this card as well as the cutting and scoring details - you'll love how quick and easy a Wallet Gift Card comes together!
(Hopefully, you will do a little better job planning for your graduation gifts and either have some cash on hand or write a check. I, however, have 2 high school kids at home who make sure I don't have much cash on hand at any given time!)
As I said, the Wallet Gift Card is designed to hold cash or checks and it fits just perfectly into a legal sized envelope. The one thing I don't like about A2 cards is when I want to include cash or a check and have to fold them to fit - Awkward!
The measurements for this card are as follows -
I created a simple belly band by layering a Tasteful Trim XL Die cut of Basic Black cardstock onto a strip of Brushed Silver cardstock. I pinched this to loosely wrap around the Wallet Gift Card and then adhered the ends. The seam is hidden below the cap/tassel punched piece. I added one of the tiny Silver Mini Brads to the cap where the tassel is attached.
All the rounded corners were done with the back punch on the Envelope Punch Board. This allowed me to punch through the two layers of cardstock along the bottom of the pocket portion of the card with no problems at all.
My Stampin' Events
Current Stampin' Up! Promotions
Mary Rindal is an Independent Stampin' Up! Demonstrator in Greenwood Village, Colorado.
(Hopefully, you will do a little better job planning for your graduation gifts and either have some cash on hand or write a check. I, however, have 2 high school kids at home who make sure I don't have much cash on hand at any given time!)
As I said, the Wallet Gift Card is designed to hold cash or checks and it fits just perfectly into a legal sized envelope. The one thing I don't like about A2 cards is when I want to include cash or a check and have to fold them to fit - Awkward!
The measurements for this card are as follows -
Cut 8 1/2" x 8 1/4" Basic Black cardstockI used the cap/tassel and diploma (masked off the sentime) to randomly stamp on the Brushed Silver pieces in VersaMark ink. Then I Heat Embossed these images with Clear Embossing Powder for a subtle background. The front sentiment and pocket congratulations sentiment are both stamped in Basic Black Craft Ink and Heat Embossed with Black Embossing Powder. Remember when you are embossing with a high contrast powder, such as black on silver, you will want to use an Embossing Buddy on the cardstock before you stamp. This will make a big difference toward keeping your embossed image nice and crisp without stray embossing grains.You can also use a small clean paintbrush to swipe away any remaining pieces of Embossing Powder BEFORE you heat it.
Scored at 2" and at 5 3/4"to create the pocket and front flap
Cut 8 1/4" x 1 3/4" and 8 1/4" x 2 1/4" Brushed Silver cardstock for the pocket and front mats
Cut 8 1/4" x 3" Whisper White cardstock for the liner
I created a simple belly band by layering a Tasteful Trim XL Die cut of Basic Black cardstock onto a strip of Brushed Silver cardstock. I pinched this to loosely wrap around the Wallet Gift Card and then adhered the ends. The seam is hidden below the cap/tassel punched piece. I added one of the tiny Silver Mini Brads to the cap where the tassel is attached.
All the rounded corners were done with the back punch on the Envelope Punch Board. This allowed me to punch through the two layers of cardstock along the bottom of the pocket portion of the card with no problems at all.
My Stampin' Events
Current Stampin' Up! Promotions
Mary Rindal is an Independent Stampin' Up! Demonstrator in Greenwood Village, Colorado.
Sunday, January 5, 2014
Stamp Review Crew: Hearts A Flutter Edition
This edition of the Stamp Review Crew features Hearts A Flutter stamp set and if you think this set is limited to a few layouts and designs, you are about to find out how versatile this fun little set of banners can be! Continue around this Hearts A Flutter Blog Hop for a ton of inspiration and a wide variety of creative and beautiful cards and projects!
My first two cards with the Hearts A Flutter stamp set are Valentine's cards. I made two sets of these cards, identical with the exception of the color tones - one traditional Real Red and Whisper White with Gold and the other non-traditional pastels Crisp Cantaloupe and Very Vanilla with Gold.
The coordinating Hearts A Flutter Framelits are definitely my friend when using this stamp set. I also loved playing with the Gold Embossed Vellum which is from the Occasions Mini Catalog that debuted this month.
Here is a close up of the Heart elements on the fronts of these cards. I stamped the largest scalloped heart image in the coordinating ink color onto the cardstock. This is die cut with the Hearts A Flutter Framelit and sponged pretty heavily to emphasize the scallops. I paper pierced the the dotted border of the image and then added white dots to the inner dotted border with the Chalk White Marker (carryover item - yaya!) The xoxo sentiment in Gold Foil is one of the accessory framelits in the Circle Thinlits Card Framelits - LOVE!
{Inside}
Recipe: (Red Valentine)
Stamps: Hearts A Flutter, Delightful Dozen
Cardstock: Real Red, Whisper White, Gold Foil, Gold Embossed Vellum
Ink: Real Red, Pink Piroutte, Gold Encore
Accessories: Hearts A Flutter Framelits, Circle Thinlits Card Framelit, White Chalk Marker, Gold Embossing Powder
{Inside}
Recipe: (Cantaloupe Valentine)
Stamps: Hearts A Flutter, Delightful Dozen
Cardstock: Soft Sky, Very Vanilla, Crisp Cantaloupe, Gold Foil, Gold Embossed Vellum
Ink:Crisp Cantaloupe, Pistachio Pudding, Soft Sky, Gold Encore
Accessories: Hearts A Flutter Framelits, Circle Thinlits Card Framelit, White Chalk Marker, Gold Embossing Powder
The last card I want to share with you is a winter themed Thank You card using the Hearts A Flutter set, using only the banner images. We are sending so many thank you's this time of year at my house that I can't keep enough of them in my stash!
I stamped the banner images in Night of Navy ink onto Whisper White and die cut them with the coordinating Hearts A Flutter Framelits. The Thanks Big Time sentiment from Timeless Talk is also stamped in Night of Navy and punched out with a 1" Circle Punch. This is popped up on one of the pennants. I ran the Night of Navy cardstock piece through the Big Shot with the Northern Flurry TIEF and then added a few Rhinestone Jewels to the snowflake centers. Pretty little bows of the Silver Trim (a carryover item so still available to order - yaya!) finish the ends of this banner.
{Inside}
Recipe:
Stamps: Hearts A Flutter, Timeless Talk, Happy Watercolor
Ink: Night of Navy
Cardstock: Marina Mist, Night of Navy, Whisper White
Accessories: Northern Flurry TIEF, Hearts A Flutter Framelits, Rhinestone Jewels, Silver Trim
Whether you are hopping through or just starting at my blog, be sure to visit the other blogs on the Stamp Review Crew: Hearts A Flutter edition by clicking on the Previous and Next buttons below. I hope you're inspired and would love to see your creations - please share!
Hearts A Flutter Blog Roll
- Yapha Mason yaphamason.com
- Debra Burgin heartfeltinkspiration.com/
- Beth Beard mylittlecraftblog.com/
- Lisa Young addinkandstamp.blogspot.com/
- Jill Coleman jillstamps.com/
- Deb Currier artfeltimpressions.blogspot.
com/ - Heidi Baks runningwscissorsstamper.
blogspot.com - Shana Gaff stressfreestamping.blogspot.
com - Kerry Willard Bray kerrywillardbray.com
- Holly Krautkremer rubberredneck.typepad.com
- Mary Rindal maryrindal.com/
- Rita Wright ritascreations.blogspot.com/
- Ann Schach stampinchic.com/
- Cindy Beach stampspaperandink.typepad.com/
- Tanya Boser tinkerin-in-ink.blogspot.com
- Nancy Smith iguanastamp.wordpress.com/
- Dawn Tidd tiddbitsfromdawn.typepad.com
My Stampin' Events
Current Stampin' Up! Promotions
Mary Rindal is an Independent Stampin' Up! Demonstrator in Greenwood Village, Colorado.
Subscribe to:
Posts (Atom)