Tuesday, January 25, 2011

Emerging Color Technique - Extreme Elements

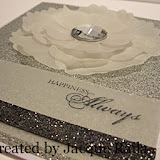
Here is a card I stamped for a Birthday swap hosted by a demonstrator friend of mine. I used the Stampin' Up! set Extreme Elements as well as the Happy Birthday sentiment from the Hostess Level I stamp set Afterthoughts.  I also used the ribbon from a FREE Sale-A-Bration item - the Ice Cream Parlor Ribbon. This was a fun card to create and I think the technique is called Emerging Color. It is a variation, or stepped-up version, of Emboss Resist. We'll be making this card at my February Technique Club event.

Trina also overlooked my 'mistake' and helped me out - this particular swap asked for full cards and envelopes - but I forgot the envelopes. She provided the envelopes for me, stamped them to coordinate and I so much appreciate her! Here's a closer look at the Emerging Color Technique.

To create this card, I first stamped a few of the smaller images from the Extreme Elements stamp set in a variety of colors. I stamped the stars in Daffodil Delight, the flourish in Melon Mambo and the dotted image in Tempting Turquoise - all randomly on the piece of Whisper White cardstock. Then I wiped it with my Embossing Buddy and stamped the large splotchy image from Extreme Elements over these in VersaMark ink. I heat embossed this with Clear Embossing Powder. The Embossing Buddy keeps the Embossing Powder on the VersaMark image only, with no stray powder sticking to my colored stamped images. Finally I used my Brayer to roll on a layer of Pumpkin Pie ink, well saturated, over the entire cardstock piece. I wiped the heat embossed area with a tissue to remove the ink from the embossed area, revealed the stamped background.

{Inside}
Recipe:
Stamps: Grunge Rock, Afterthoughts
Ink: VersaMark, Pumpkin Pie, Daffodil Delight, Tempting Turquoise
Cardstock: Tempting Turquoise, Daffodil Delight, Pumpkin Pie, Whisper White
Accessories: Polka Dot Texture Folder, Circles #2 Die for the Big shot, 1 3/4" Circle Punch, Clear Embossing Powder, Ice Cream Parlor Ribbon (SAB)


My Stampin' Events
Current Stampin' Up! Promotions


Mary Rindal is an Independent Stampin' Up! Demonstrator in Greenwood Village, Colorado.

Thursday, January 20, 2011

Crystal Effects - Clearly for You


 Here is a pretty card I made using the Clearly for You stamp set - one of the new sets from the Occasions Mini Catalog from Stampin' Up! I used my markers to ink up this raspberry image and then I used a bit of Crystal Effects on the berries to give them a beautiful shine that has a bit of raised texture to it as well.

Here's a closer look at the Crystal Effects on the raspberries - CE is just one of my favorite products to add a touch of shine and simmer. There are some fun techniques using CE, too - we'll be using a few of them at my Technique Club in January and in February. The only drawback using CE is that you have to give yourself time to let it dry - usually about 20 minutes, sometimes longer, depending on how thick you have it.

{Inside}
Recipe:
Stamps: Clearly for You
Cardstock: Night of Navy, Cherry Cobbler, Old Olive, Whisper White
Ink: Cherry Cobbler Marker, Old Olive Marker, Night of Navy
Accessories: Crystal Effects, Scallop Trim Border Punch, Night of Navy Taffeta Ribbon


My Stampin' Events
Current Stampin' Up! Promotions


Mary Rindal is an Independent Stampin' Up! Demonstrator in Greenwood Village, Colorado.

Monday, January 17, 2011

Suspension Card - Northern Frost

This Suspension Card is a pretty simple card to make, but so much fun because of the movement, I think. We made this at my December Technique Club along with some other 'moving' cards. I used the Polka Dot Textured Embossing Folder and some of the smaller snowflakes from the Northern Frost Strip, both for the Big Shot.

Here's a closer look at the spinning snowflake on this card. We just added a touch of Dazzling Diamonds glitter to the snowflakes and a bow of White narrow Taffeta Ribbon to the front with a sentiment on the inside to finish these.
{Inside}
Recipe:
Stamps: Afterthoughts
Cardstock: Marina Mist, Whisper White
Ink: Marina Mist
Accessories: Northern Frost Strip, Polka Dot Texture Folder, Whisper 1/8" Taffeta Ribbon, White Embroidery Floss, Dazzling Diamonds Ultra Fine Glitter


My Stampin' Events
Current Stampin' Up! Promotions


Mary Rindal is an Independent Stampin' Up! Demonstrator in Greenwood Village, Colorado.

Friday, January 14, 2011

Valentine Candy Wrapper - You're a Gem

Here is another little Valentine cutie - I used the You're a Gem stamp set from the new Occasions Mini catalog and the Patterns Love Designer Series Paper with the Candy Wrapper die for the Big Shot. The Patterns Love paper is an exclusive DSP for the Filled with Love Bundle and will only be offered until January 24th, so be sure to order yours! This bundle includes the Filled with Love stamp set, the Patterns Love DSP and a free package of clear Itty Bitty Buttons.

What do you want in your Valentine treat? Chocolate? Jewelry?


My Stampin' Events
Current Stampin' Up! Promotions


Mary Rindal is an Independent Stampin' Up! Demonstrator in Greenwood Village, Colorado.

Wednesday, January 12, 2011

January Workshop Card - Clearly for You

This is one of the cards that my customers will stamp at my January workshops. It uses one of the stamps from the new Clearly for You stamp set in the Stampin' Up! Occasions Mini Catalog. This stamp set has a wide variety of images and a few sentiments and although the AMOUR sentiment could be used year-round, I really like it on this Valentine card.

This is the best time of year to hold a workshop with the annual Stampin' Up! promotion Sale-A-Bration where you earn a FREE SAB stamp set or product with every $300 in workshop sales. Customers earn a FREE SAB stamp set or product with every $50 purchase as well. Call or e-mail me today to set up your workshop and have some fun stampin' with your friends - let me do all the work! We can even hold it at my house if that is easier for you.

 {Inside}
Recipe:
Stamps: Clearly for You
Ink: Regal Rose
Cardstock: Pretty in Pink, Regal Rose, Very Vanilla
Accessories: Very Vanilla Satin Ribbon, Basic Jewels Pearls, Polka Dot Texture Impressions Folder, Designer Label Punch, Large Oval Punch


My Stampin' Events
Current Stampin' Up! Promotions


Mary Rindal is an Independent Stampin' Up! Demonstrator in Greenwood Village, Colorado.

Monday, January 10, 2011

Filled with Love - Vintage

I have been having fun with my new Filled with Love bundle from Stampin' Up! For this card I wanted to go in a more vintage style than my usual. I used Crumb Cake and Bashful Blue with the Patterns Love Designer Series Paper with a Pink Pirouette card base and Very Vanilla as my neutral.


The hearts are stamped in Crumb Cake onto the Crumb Cake cardstock and then I used the Full Heart Punch to punch them out. I stamped the LOVE sentiment in Real Red onto the strip of Very Vanilla and then I overstamped that with Crumb Cake ink on the Sanded background. The Sanded background is stamped onto the Bashful Blue strip as well, before I ran it through the Big Shot with the Polka Dots Texture Impressions Folder. For the Itty Bitty Buttons, which are FREE when you order the stamp set and DSP, I stamped the heart image in Early Espresso ink onto Crumb Cake and then punched the button shape out with the corresponding Itty Bitty Punch. The 4 hearts in a circle image is stamped in Real Red ink onto Crumb Cake and then punched out with the 3/4" Circle Punch and adhered with Stampin' Dimensionals. I punched the bottom of the Bashful Blue strip with the Scallop Trim Border Punch - do you see a pattern here? I just love how our punches coordinate with our stamp sets!

{Inside}
Recipe:
Stamps: Filled with Love
Cardstock: Pattern Love DSP, Pink Pirouette, Crumb Cake, Bashful Blue, Very Vanilla
Ink: Early Espresso, Crumb Cake, Real Red
Accessories: Itty Bitty Buttons, Polka Dots Texture Impressions Folder, Bashful Blue Satin Ribbon, 3/4" Circle Punch, Scallop Trim Border Punch, Full Heart Punch, Itty Bitty Punch


My Stampin' Events
Current Stampin' Up! Promotions


Mary Rindal is an Independent Stampin' Up! Demonstrator in Greenwood Village, Colorado.

Friday, January 7, 2011

Burgundy Queen for a day - You're a Gem

I hope you enjoyed all the ideas and projects featured last weekend at the Stampin' Addicts Occasions Mini Blog Hop! If you didn't have a chance to go through them, check here for my blog post featuring You're a Gem stamp set and Botanical Gazette DSP. From there, you can click through to all the blogs and projects featuring new items from the Occasions Mini Catalog.

Here's another look at the Queen for a Day card I featured as one of my projects. The You're a Gem stamp set has such fun sentiments in it - I really enjoyed playing with it as I got ready for the blog hop. For this card I used Clearly for You stamp set, You're a Gem and a piece of paper from the Botanical Gazette DSP. I followed the color lead from the Botanical Gazette paper, using Bravo Burgundy and Marina Mist, then paired with Very Vanilla. I stamped the script background En Francais in Bravo Burgundy ink over the Bravo Burgundy card base. The rectangles are an image from Clearly For You stamped in Early Espresso ink onto Very Vanilla cardstock. I sponged the edges in Early Espresso ink as well and then mounted them with Stampin' Dimensionals for some lift. I tucked a tab of Very Vanilla 5/8" Grosgrain Ribbon behind the top piece. I stamped the sentiment in Early Espresso ink onto Very Vanilla cardstock and then punched it out with my Large Oval Punch and sponged the edges in Early Espresso ink. This is layered onto a piece of Marina Mist cardstock, punched with the Decorator Label Punch and sponged with Marina Mist ink. Finally, I stamped the crown from Clearly for You in Bravo Burgundy ink and added Dazzling Diamonds Ultra Fine Glitter with my Two Way Glue Pen for lots of sparkle. This is cut out with my Paper Snips and adhered with a Stampin' Dimensional over the sentiment.

TIP: When cutting out an image, move the paper, not your scissors and if you don't want a white edge, run the matching Marker brush tip around the finished piece. This darkens all those little white areas and gives a clean, crisp cut edge.

{Inside}
Recipe:
Stamps: Clearly for You, You're a Gem
Cardstock: Bravo Burgundy, Marina Mist, Very Vanilla, Botanical Gazette DSP
Ink: Bravo Burgundy, Early Espresso, Marina Mist
Accessories: Dazzling Diamonds, Very Vanilla 5/8" Grosgrain, Decorator Label Punch, Large Oval Punch, Sponge Daubers


My Stampin' Events
Current Stampin' Up! Promotions


Mary Rindal is an Independent Stampin' Up! Demonstrator in Greenwood Village, Colorado.

Wednesday, January 5, 2011

Fall Scrap Page - You're a Gem

This is the FALL scrapbook page I featured last weekend for the Stampin' Addicts Occasions Mini Blog Hop. I haven't been scrapping much (at all) since last spring, but I've been missing it and this page really made me happy. It's a simple page, but sometimes that's all I want. I used this paper from the Botanical Gazette DSP as my base page and built off its colors and texture.

I wrapped the Hemp Twine around the upper corner and gave it a few twists before adhering it to the back of the paper. Then I used my CropADile tool to add these Jumbo Eyelets. The title pieces are cut from Bravo Burgundy cardstock using the Serif Alphabet for the Big Shot. This alphabet is a great investment for scrapbooking and 3D projects. I stamped them with En Francais background stamp in Bravo Burgundy ink and then sponged the edges. I really like the difference the stamping and sponging makes in person, although you can't really see it in the photos.
Here's a closer look at the two sentiment tags I made for the photos. I heat embossed the sentiments from You're a Gem stamp set in Bravo Burgundy ink with Clear Embossing Powder and punched them out. I added some texture by inking them lightly with the edges of my Sahara Sand and Bravo Burgundy ink pads. This is called Direct to Paper and I thought it mimicked the texture on the Designer Series Paper. I sponged the edges and layered them onto a mat punch with the Decorator Label Punch and Bravo Burgundy cardstock. I also did a bit of Direct to Paper on the So Saffron photo mat, again using my Sahara Sand ink pad.

For the journaling I wrote directly onto the base page using a Journaling Pen. Although I don't really love my handwriting and especially don't like the angle and tilt of my journaling, I love seeing my mom and grandmother's handwriting, so I try to handwrite most of my journaling.

TIP: ALWAYS use an archival pen to write your journaling. Even if you use Classic Ink (instead of Craft Ink, which lasts longer) on your scrapbook pages, always write your journaling in an ink that will stand the test of time and will not fade. Stampin' Up has two colors of Journaling pens and I can't recommend them enough for your scrapbook entries.


My Stampin' Events
Current Stampin' Up! Promotions


Mary Rindal is an Independent Stampin' Up! Demonstrator in Greenwood Village, Colorado.

Monday, January 3, 2011

Simply Adorned Charm Inserts - You're a Gem

Over the weekend I participated in the Stampin' Addict Occasions Mini Blog Hop, featuring products and ideas from the Stampin' Up! Occasions Mini Catalog which debuts today. I highlighted projects using Botanical Gazette Designer Series Paper and You're a Gem stamp set and fell in love with them both. Here's a closer look at the Simply Adorned charm inserts I created. These are a great gift and it is so fun to create new inserts for the charms, whether for you or for someone else!


The largest charm on my necklace is a 1 x 1 1/4" Rectangle, although Stampin' Up! does sell a larger 1 1/2 x 2" Rectangle charm as well. This size charm has a beveled glass front and plain glass back. You can see in the photo on the upper left, the reflection of the beveled glass. In this photo on the right, is the plain glass back.


To work on this tiny canvas I like to start with a base piece, cut to size. The Simply Adorned charms come with an insert and this can be a great pattern for the new inserts you create. For the blue 'live life' side of this insert, I used a scrap piece of stamped cardstock trimmed to size. This piece had a  clear embossed raspberry image from Clearly for You stamp set, overstamped with the background image from the same stamp set. I cut it to 1 x 1 /4" and then checked to be sure it fit correctly inside the charm before I continued. (And yes, I did have to trim a tiny bit more!) Then I stamped the 'live life' portion of the sentiment from You're a Gem stamp set and the tiny flower image from Clearly for You in Not Quite Navy ink. Finally, I added a Rhinestone Jewel to the flower center and sponged the edges. For the 5/8" Circle and 5/8" Square charm inserts I punched (1/2" Circle Punch fits perfectly) and trimmed stamped scrap papers to fit. I sponged the edges and added a tiny bit of Dazzling Diamonds Ultra Fine Glitter.

For this 'love life' side of my Simply Adorned charm insert, I stamped the raspberry image from Clearly for You in Not Quite Navy ink onto the back of the Very Vanilla piece. Then I stamped the 'love life' portion of the sentiment from You're a Gem stamp set in Early Espresso ink over the left edge. Finally I tore a scrap of Botanical Gazette DSP and rolled the edge. This is adhered to the corner of the charm insert and the edges trimmed to fit. I sponged everything with Early Espresso ink as well. Again, the smaller 5/8" charm inserts are simply scrap pieces of stamped and pattern papers and I also added a torn edge of pattern paper to one. I used portions of the words from the sentiments in You're a Gem stamp set for these smaller charms and sponged all the edges.

Those little pieces of stamped images or pattern papers work like a charm (!!) for creating your inserts, so always take a look at your table for your next charm insert before you clean up.


My Stampin' Events
Current Stampin' Up! Promotions


Mary Rindal is an Independent Stampin' Up! Demonstrator in Greenwood Village, Colorado.

Saturday, January 1, 2011

Challenges - Filled with Love

Here is a card I made using the Filled with Love stamp set and Patterns Love Designers Series Paper that are featured in the current Filled with Love promotion from Stampin' Up! (Check my sidebar for details on this promotion.) I used the Utah Divas International Color Challenge - Soft Suede, Real Red, Regal Rose and Blushing Bride - as well as the Stamping 411 Sketch Challenge for the layout.

I embossed the full heart image with VersaMark ink and my Real Red Classic Ink Pad with Clear Embossing Powder. These are stamped onto Blushing Bride cardstock and then punched out with the Full Heart Punch. The sentiment is stamped the same way onto Very Vanilla cardstock and punched with the Modern Label Punch.

I stamped the cherub image from Clearly for You stamp set in Regal Rose ink onto Blushing Bride cardstock and heat embossed it as well before cutting it out. Most of the other cardstock pieces were also stamped with the Sanded background stamp.

{Inside}
Recipe:
Stamps: Clearly for You, Filled with Love, Sanded
Cardstock: Soft Suede, Real Red, Blushing Bride, Very Vanilla, Patterns Love DSP
Ink: VersaMark, Real Red, Regal Rose
Accessories: Movers & Shapers Punch Windows for the Big Shot, Modern Label, Full Heart, Small Heart, Eyelet Border, Medium Jewelry Punches, Clear Embossing Powder, Hemp Twine


My Stampin' Events
Current Stampin' Up! Promotions


Mary Rindal is an Independent Stampin' Up! Demonstrator in Greenwood Village, Colorado.
Related Posts with Thumbnails